Why do we need iptables for RPi.
- Restrict connections to services if you are connected to the internet directly.
- Ability to control connections states and proper TCP connections.
- Ability restrict to allowed connections to the RPi from remote locations.
As you probably found out that the Raspberry Pi does not have iptables installed by default. This is a good thing unless you plan to connect your RPi to the internet. This leaves your SSH (if you have it enabled) connection open to attack if you don't plan to setup a more secure private key connection to SSH. Which I would suggest doing anyway. I plan cover that in a future blog.

What I am planning to cover
- Install of iptables for RPi.
- Configure basic rules sets for connections to SSH and HTTP services.
- Create a script to save your rulesets.
- Setup loading rule sets on start-up or your RPi.
Getting Started
Current overview of my configuration. Using an 8Gig SDCard. I downloaded these items.
If you would like to setup a static IP or learning to connect to RPi via SSH view my blog
here
Installing iptables
During this install of iptables I am going to install the package via SSH.
By default iptables is set to allow all connections.
- Type "sudo apt-get install iptables". press Enter this will download and install the current available version of iptables to you RPi.
Adding rules to iptables
At minimum we want to have a few rules in our iptables. These rules are not for you to use your RPi as a firewall. Plus it would be difficult with only one NIC. You must do these in order or connections could fail. Rules go top down in order.
Skip any rule except ones in blue.

- Type "sudo iptables -A INPUT -j ACCEPT -m state --state ESTABLISHED,RELATED". press Enter This will allow any connection that has been properly established and related to pass though. This is really only needed if you have opened a port like the rule 2. below.
- Type "sudo iptables -A INPUT -p tcp --dport 80 -m state --state NEW -j ACCEPT". press Enter. This will allow you to host a website on your RPi on port 80.
- Type "sudo iptables -A INPUT -p tcp --dport 22 -m state --state NEW -j ACCEPT". press Enter. This will allow you connect to your RPi via SSH.
- Type "sudo iptables -A INPUT -p tcp --dport 5901 -m state --state NEW -j ACCEPT" press Enter. This will allow you access if you have TightVNC installed.
- Type "sudo iptables -A INPUT -p icmp -m icmp --icmp-type 8 -j ACCEPT". press Enter. This will allow you to ping your RPi.
- Type "sudo iptables -P INPUT DROP". press Enter. This will block all inbound traffic not accepted by a rule.
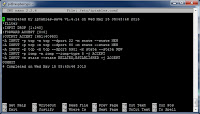
- Now type "sudo iptables -L". press Enter. You should see your rules loaded.
Saving the configuration to a file
In this section I am going to simply cover saving your shiny new iptables configuration to a file. Then create a script to call iptables-save which will allow us to save the file anytime.
- Type "cd /etc | sudo iptables-save > iptables.conf". press Enter. This will save the currently running ruleset from memory into /etc/iptables.conf file.
- Type "cd ~/". press Enter. Put us in your home directory.
- Type "echo '#!/bin/bash' | sudo tee ~/savetables". press Enter. This is the header for the script file.
- Type "echo '/sbin/iptables-save > /etc/iptables.conf' | sudo tee -a ~/savetables". press Enter. This is the command to save the table information to /etc/iptables.conf file.
- Type "sudo chmod +x ~/savetables". press Enter. This will set the file to have execute permissions.
- Type "cd ~ | sudo ./savetables". press Enter. This command will allow you to save the configuration file anytime.
Applying rules to the eth0 interface to stay persistent
We are going to start off by creating a script file in the network directory to execute our iptables when our eth0 interface is up and running.

- Type "echo '#!/bin/bash' | sudo tee /etc/network/if-up.d/iptables". press Enter. This is the header for the script file.
- Type "echo '/sbin/iptables-restore < /etc/iptables.conf' | sudo tee -a /etc/network/if-up.d/iptables". press Enter. This is the command that will load our iptables on our eth0 interface.
- Type "sudo chmod +x /etc/network/if-up.d/iptables". press Enter. This will set the file to have execute permissions.
- Type "sudo reboot". press Enter. After your RPi comes back up you should now be able to type "sudo iptables -L" and see your rules listed under INPUT.
Known Issues
None


Hey there, I must be missing something - it looks like iptables isn't installed (or not completely?) on the Wheezy image I have. When I try to run any iptables command, I get:
ReplyDelete--
libkmod: ERROR ../libkmod/libkmod.c:554 kmod_search_moddep: could not open moddep file '/lib/modules/3.6.11+/modules.dep.bin'
iptables v1.4.14: can't initialize iptables table `filter': Table does not exist (do you need to insmod?)
Perhaps iptables or your kernel needs to be upgraded.
--
same probleme :s
Deleterpi-update solve the probleme
DeleteAny thoughts on why I get "-bash: iptables.conf: Permission denied" after typing "cd /etc | sudo iptables-save > iptables.conf"?
ReplyDeleteI can't seem to move past it.
Late reply, but sudo su - will work.
DeleteThis helped so much! Thanks!
ReplyDelete